[fts_pinterest type=single_board_pins pinterest_name=bossinassatko board_id=evie-frye pins_count=20]
Category: Cosmaking
Tutorials, descriptions and photos of how I made my costumes.

Dark Barriss – Accessories
Bracer
Because its costume from animated series, I decided to make the pattern by painting it on the leather.
First I measured up my forearm and created the pattern. I transferred it onto the leather and cut it out. As fastening, I decided to use snaps. I measuered where I want them and attached them to the leather.
Then I made patterns to draw regular “V” signs onto the leather. I used beige leather colour of Terno brand. As it was lighter color and darker leather, I used several coats.
Only thing missing was compad. Its just few pieces of ABS we have left, 0,5 cm thick, which I dremmeled into oval shape and glued onto each other – one oval shaped and three circles. Its then spayed on by metalic silver colour. The compad is glued onto the leather by glue called chemoprén.


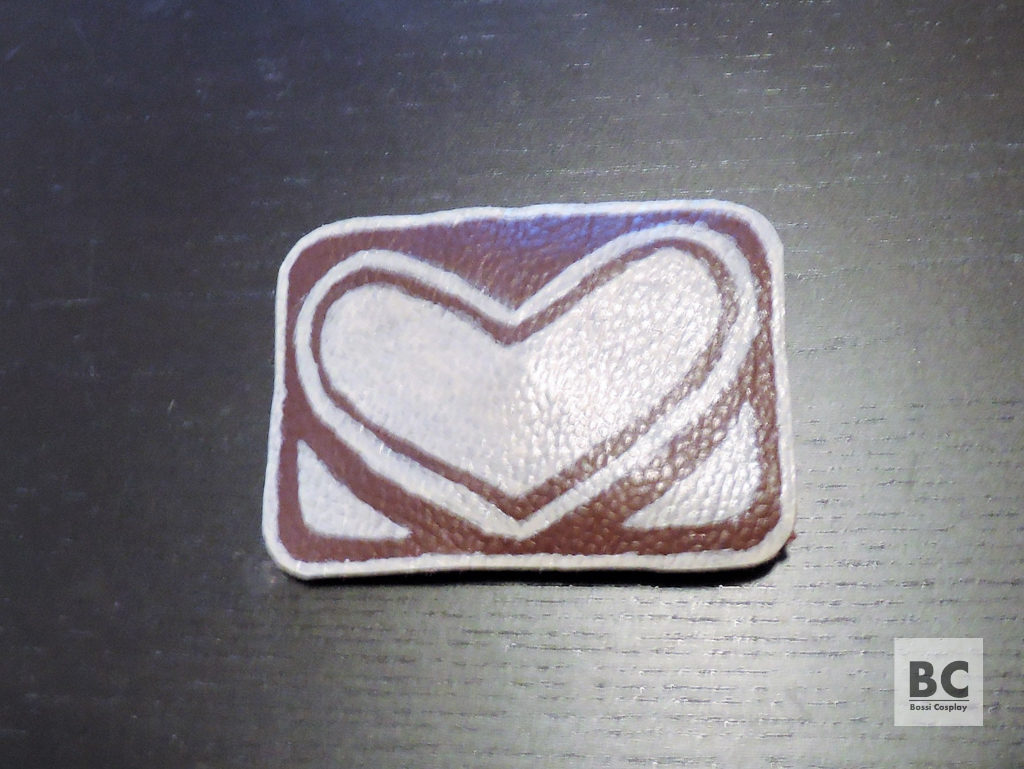
Buckle
In The Clone Wars the buckle is simplified. I decided for painting – the same as for bracer. I just painted the picture, based on the reference, on the piece of leather.
As the basis for the buckle I used my favourite buckle used by Czech Army. I used the same one for my film Barriss, so I can just switch the buckles and use the same belt (see how fastening looks on picture belows to understand). I used the same leather as for bracers. I just glued the painted piece onto the buckle.


Head cover and the wig
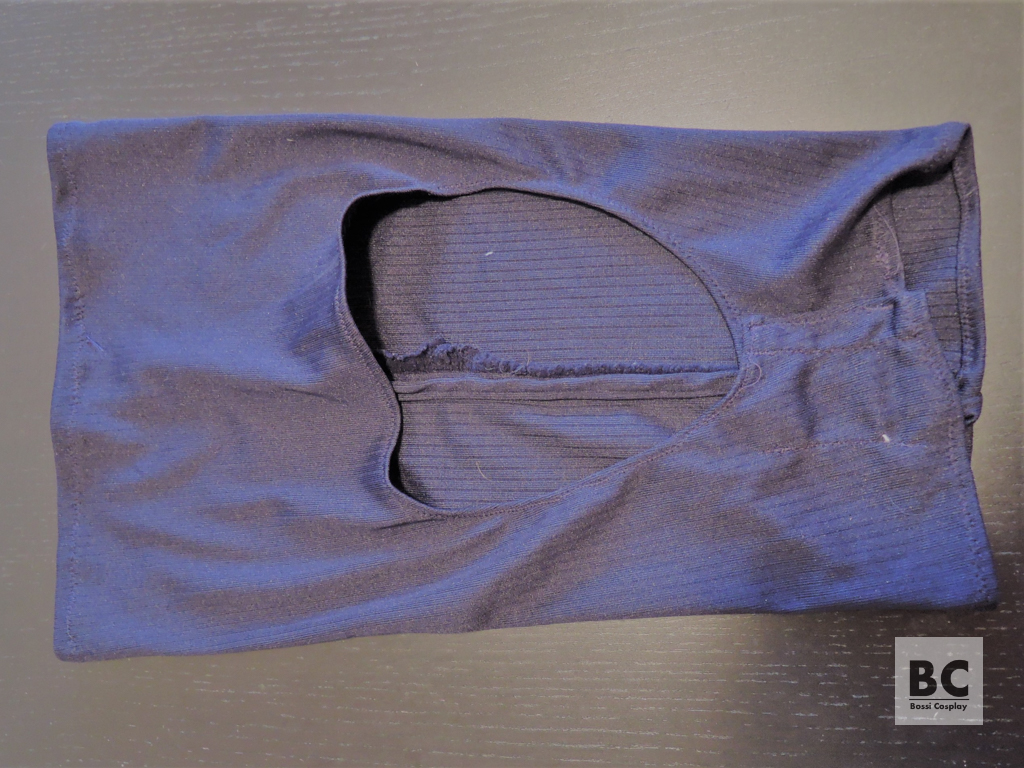
Originally, for my film version, I used only head band made from elastic fabric. Under the hood I had just my hair in the bun and this head band.
For this Barriss I had to get the wig. I chose some black pointy anime style wig. I didn’t really bother myself with its bangs and with its overall shape. The only thing which mattered to me was to have it spiky at the back.

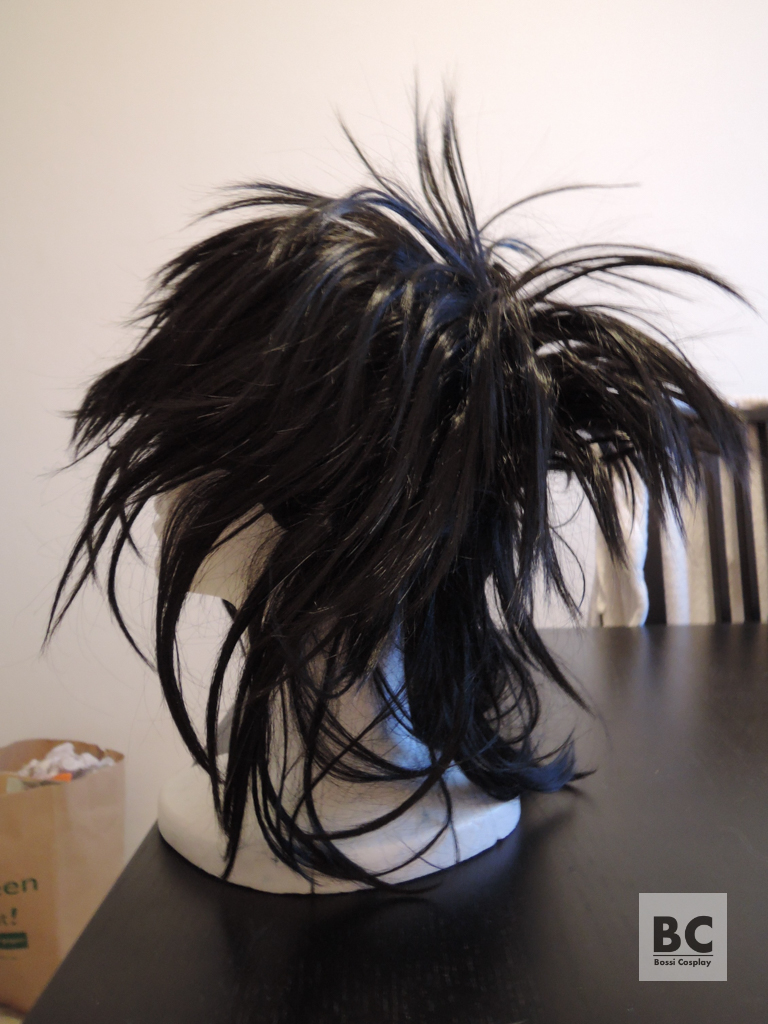
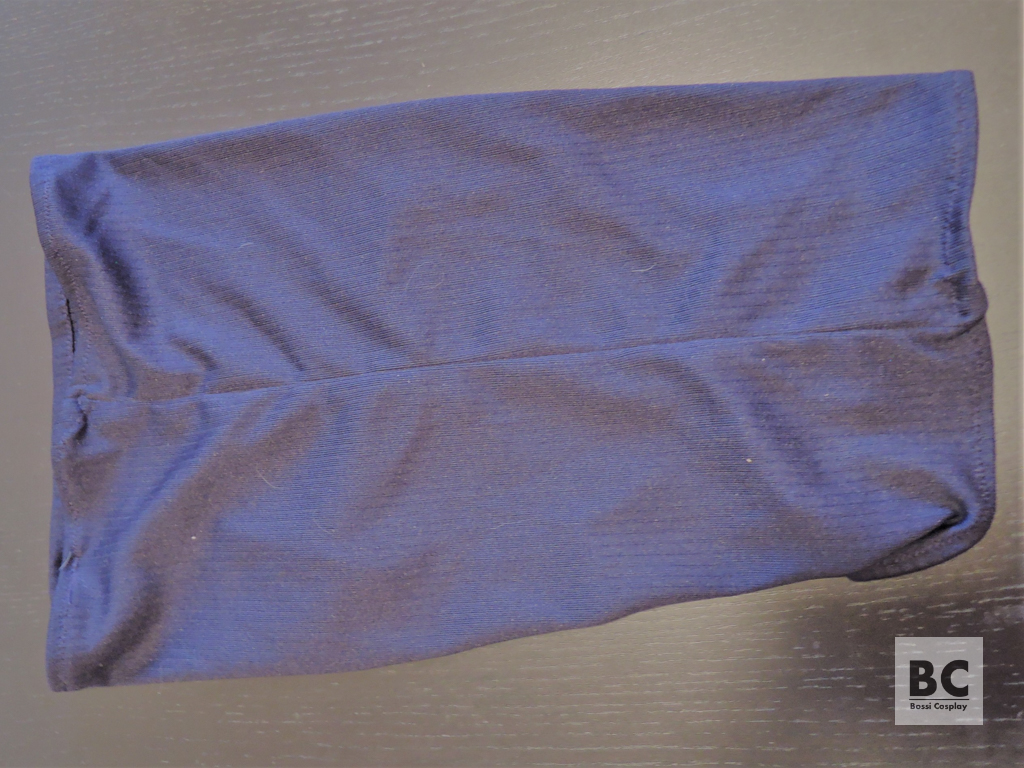
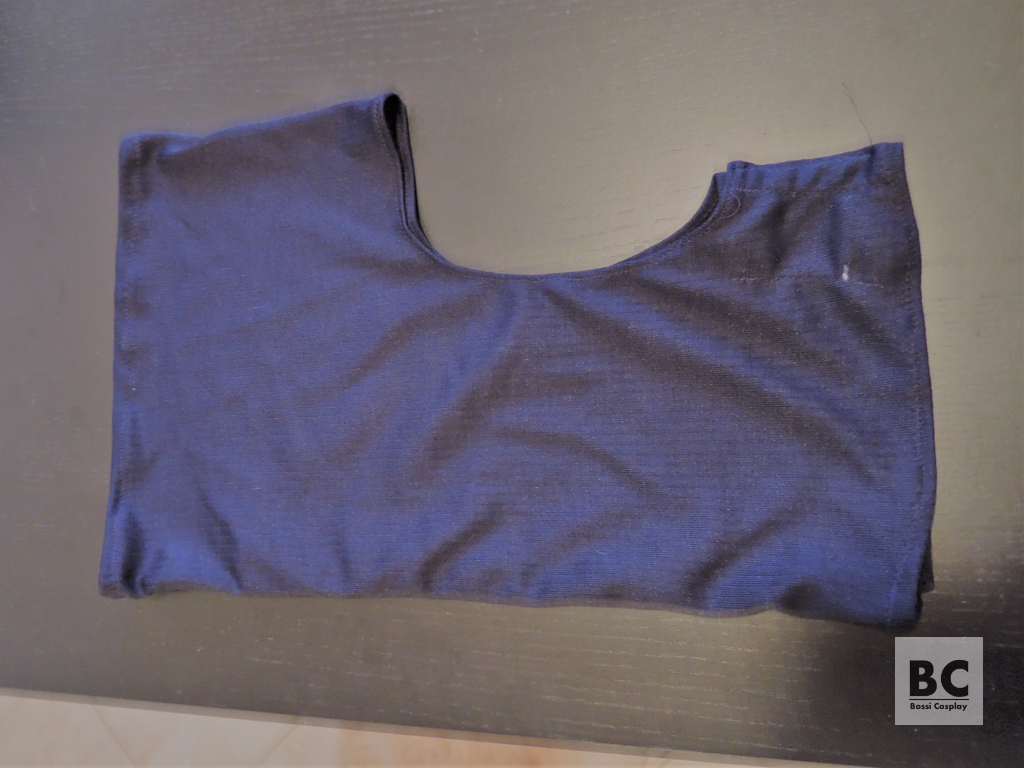
As soon as the wig arrived, I could make a head cover. I took the same elastic fabric I used for top of Barriss’s dress. I cut out a rectangle and sew it together.
I put on the wig and put on the fabric. One end I had around the neck (later I went on and made it tighter) and one end I had around my face. One part being stratched over my head and one part gathered under my chin and around my neck. I marked the place on the back of my head, where I wanted my hear to be visible.
I cut out the hole according to my marks. I started with a bit smaller hole and widened it until I was satisfied. I hemmed it all and that was it.
Since then I wear this wig and this head cover even with my film version of Barriss. Fans are always so surprised and they so appreciate when my cape accidently fells down and they see I have the hair and head cover as Barriss in The Clone Wars. 😉
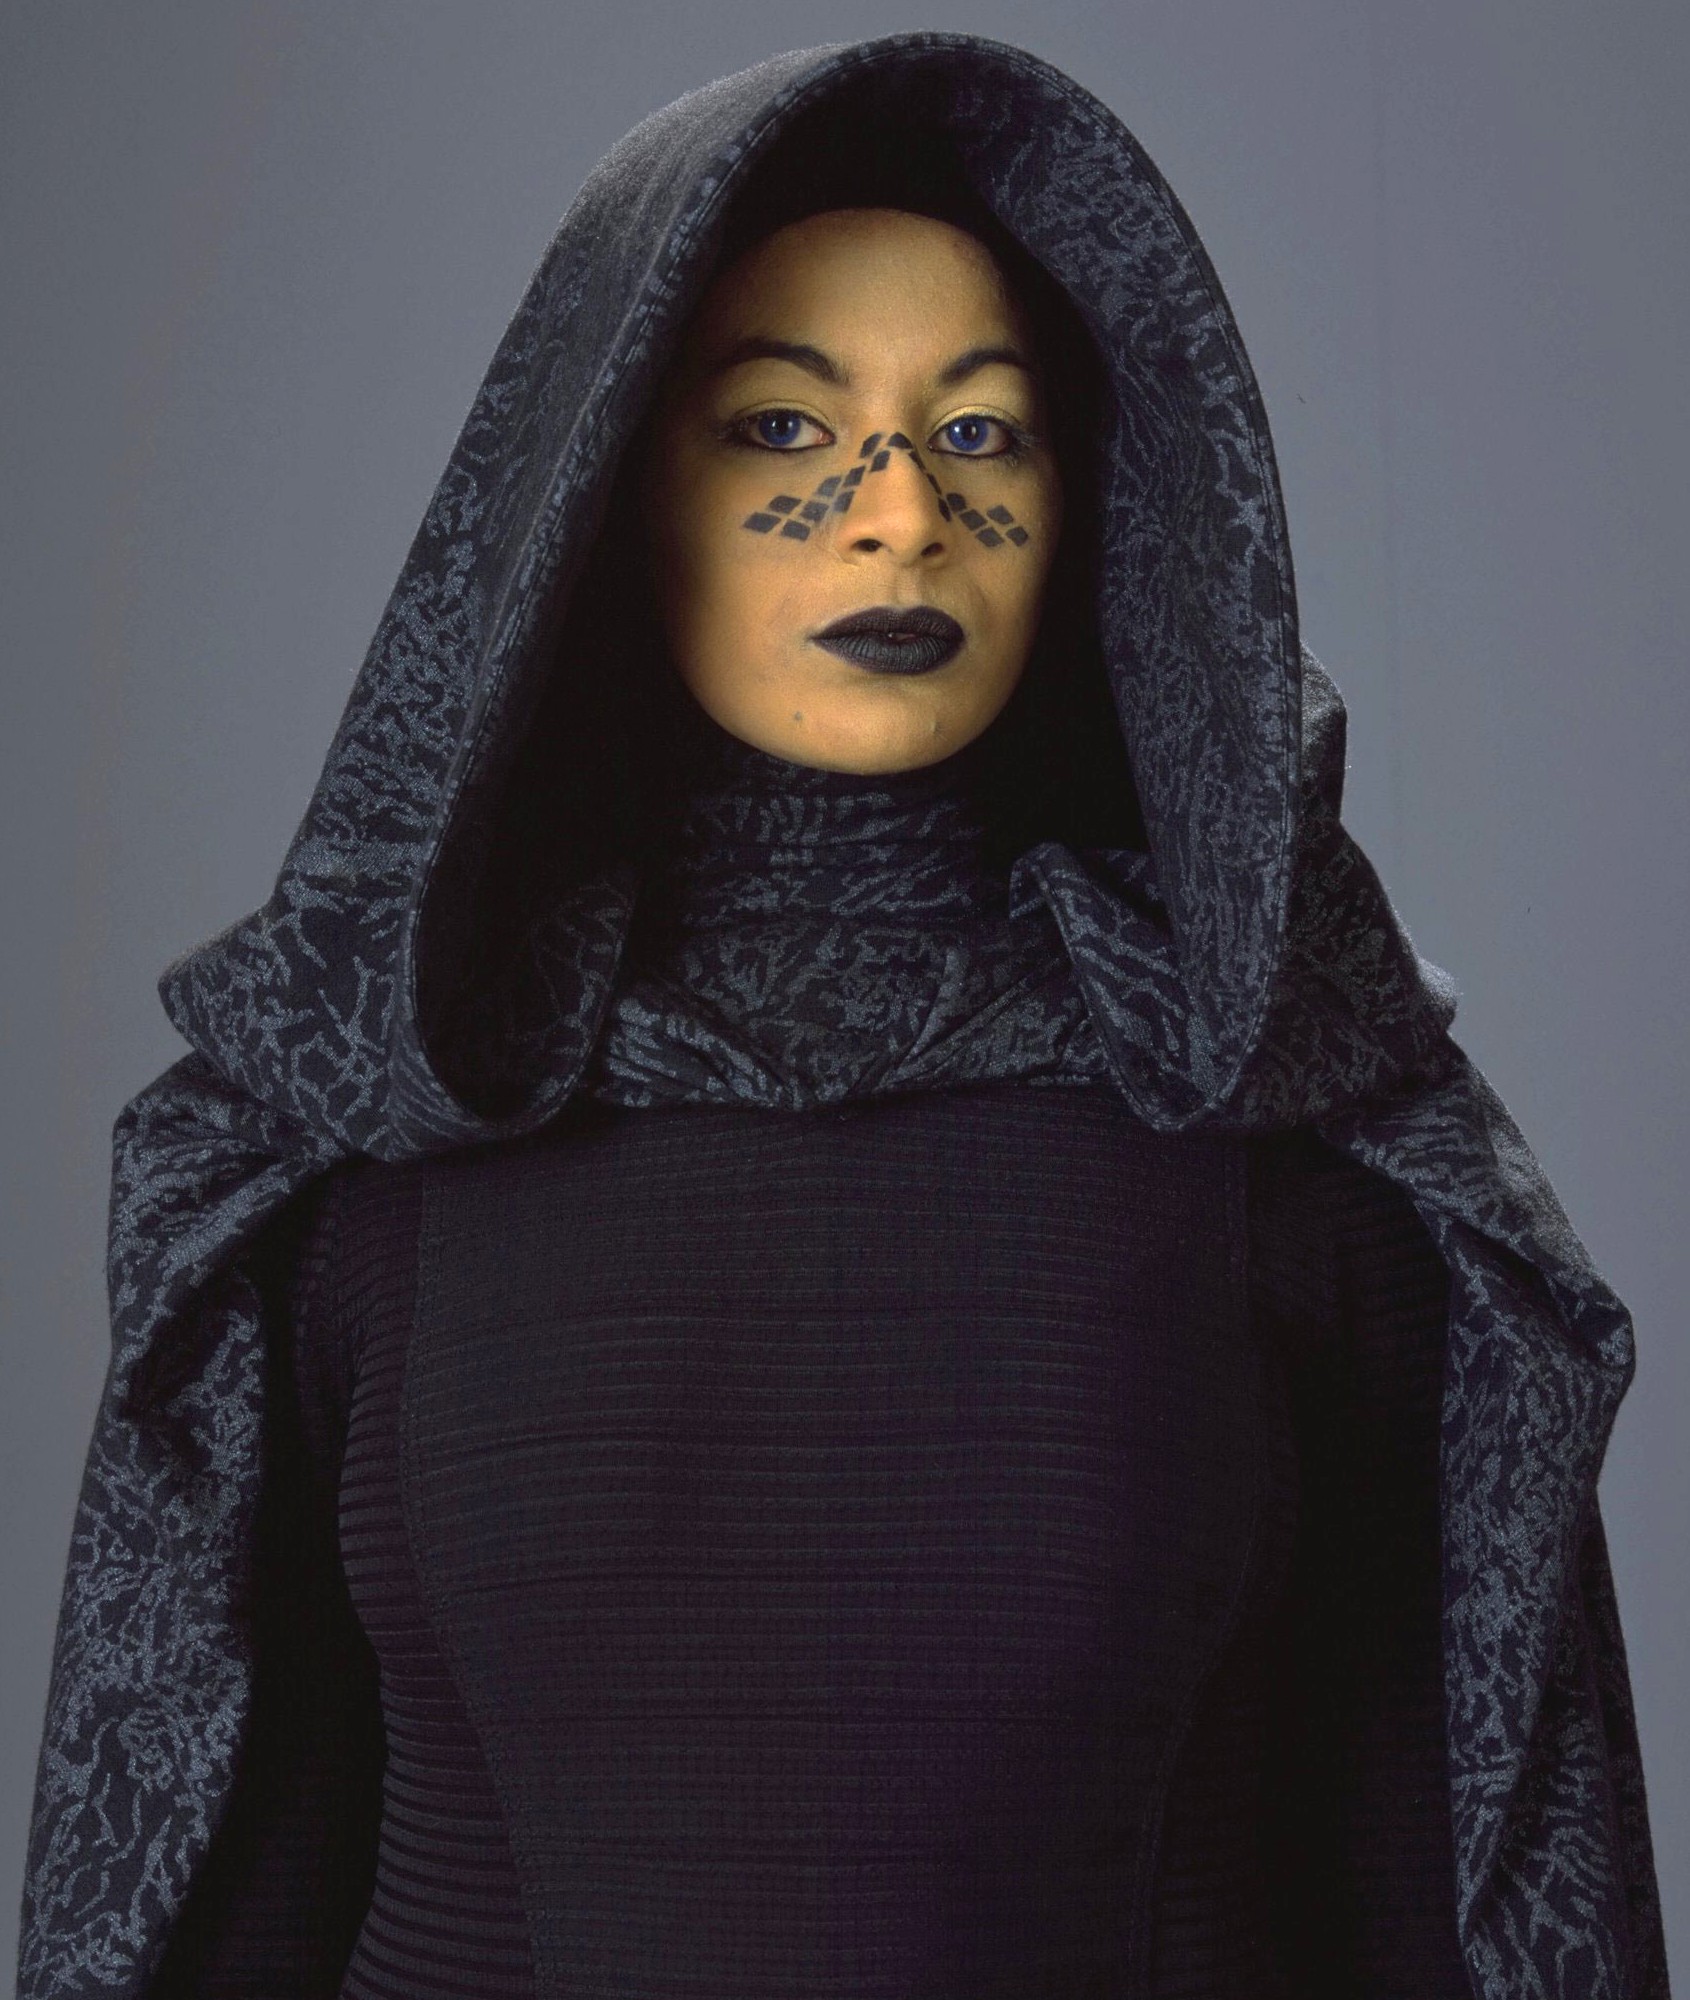
Lightsabers and make-up
For tatoos I use the same stencil as for my film version Barriss. I just leave out some of the diamonds as the tatoos are again simplified in The Clone Wars.
I also use the same make-up as for my film version, I just add more yellow color.
I use Hasbro FX Collectibles Asajj Ventress lightsabers.

Rey (Resistance) – vest
To make a vest seems to be so simple… And I already made a vest for my Claire costume, and Jyn costume, so I should be an expert by now. Well, its never so easy with cosplay. So, yes, I’ve learned something from my previous works – its better to start with a mock-up.
As the base for my pattern I used a short light vest I already owned and which fitted me well. I drew it on pattern paper, shortened it and added a colar. I cut the pattern into several parts according to where seams are on the original.
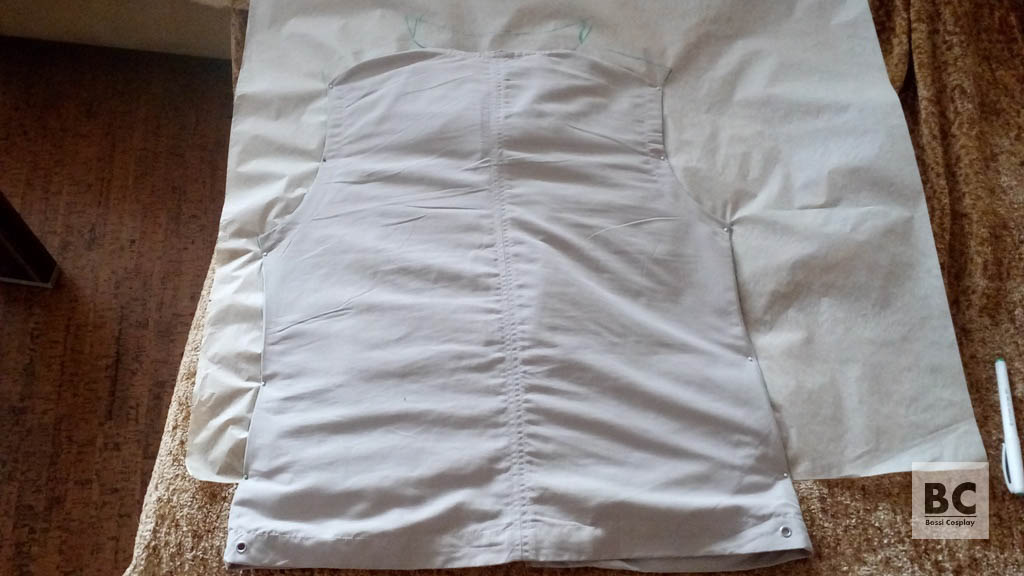


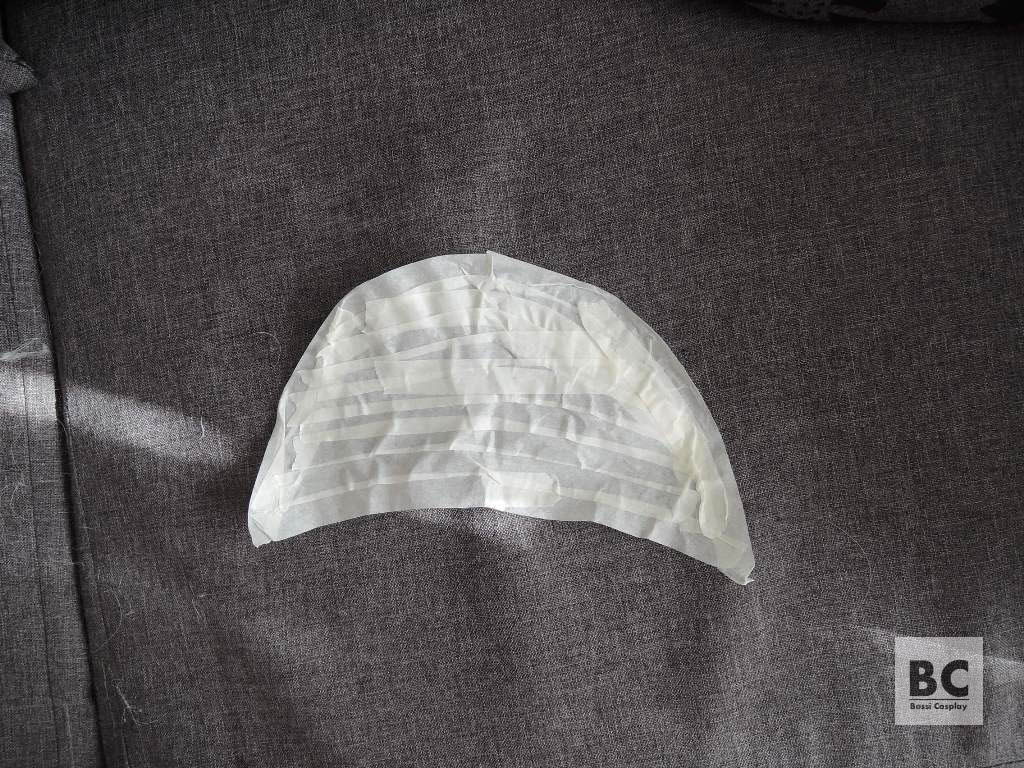
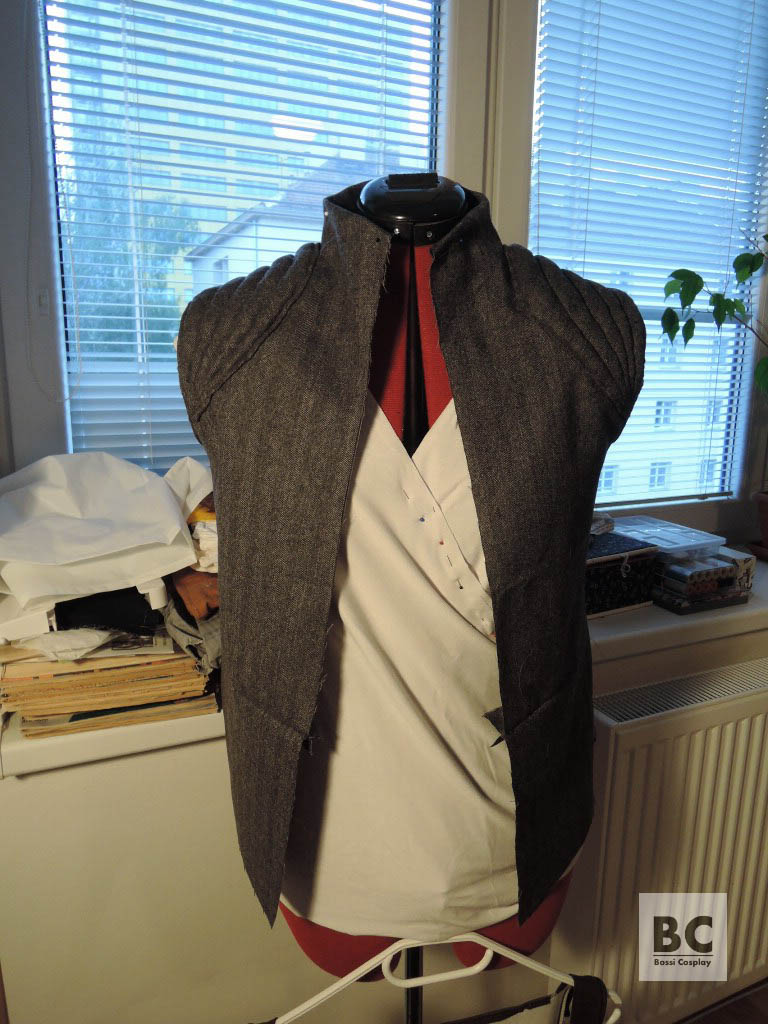
I transferred the patterns onto mock-up fabric, cut them out and sew them together. I adjusted the arm holes, the seams at the back and the length of the middle part – to have the seam in my waste. It was a lot of trying-ons, cutting and ripping. Finaly, when everything fitted, I put the vest on my dressing form and with paper tape I created the pattern for “shoulder pads”.
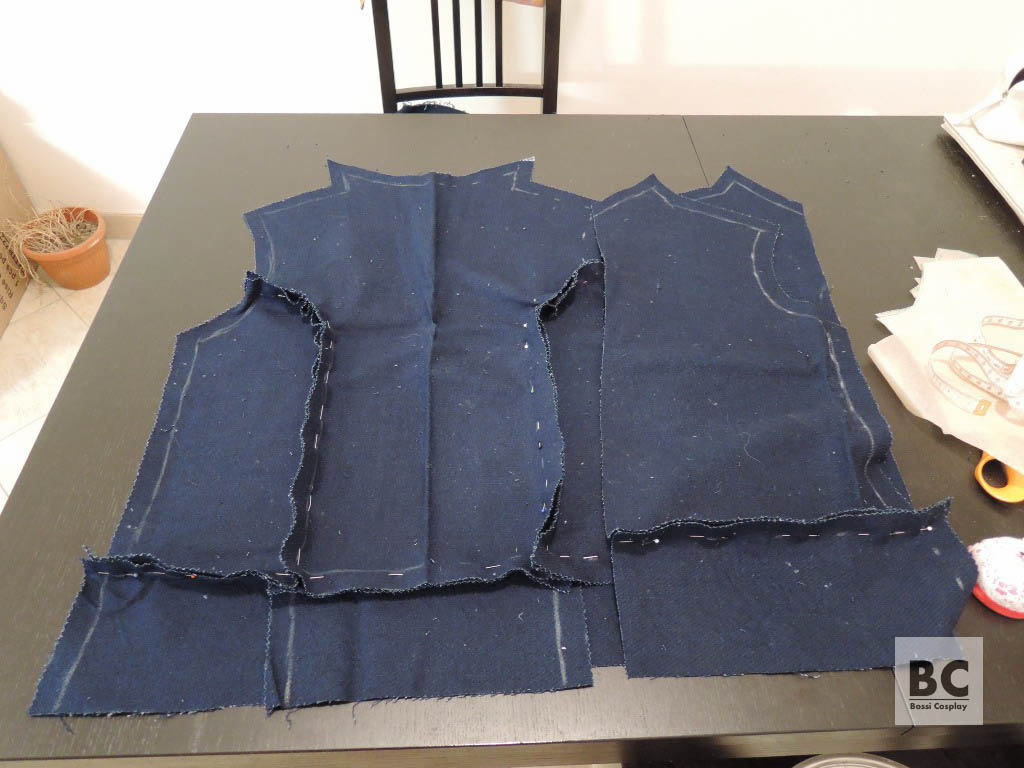

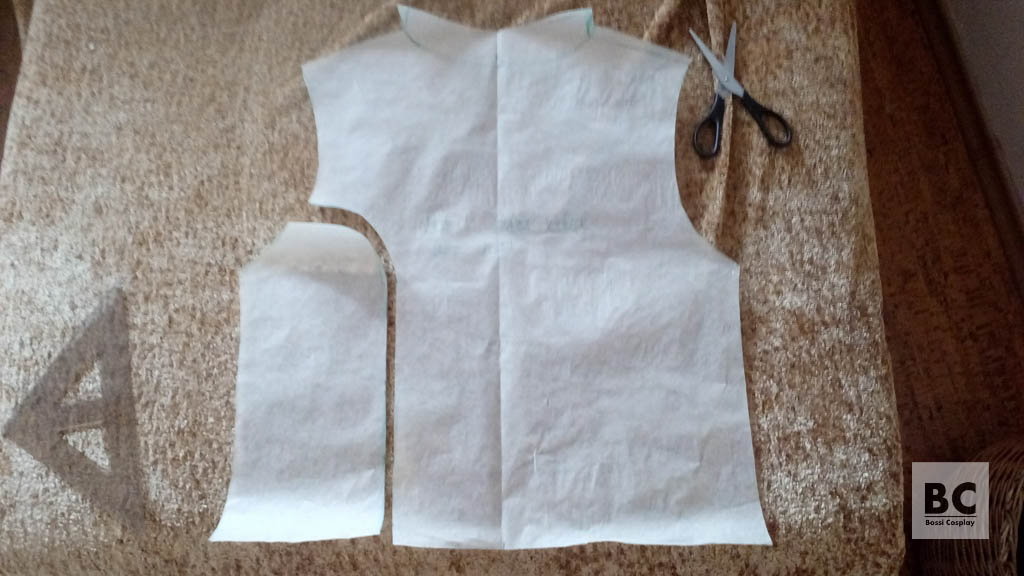
When I was satisfied with the mock-up, I ripped it apart and created clean patterns.

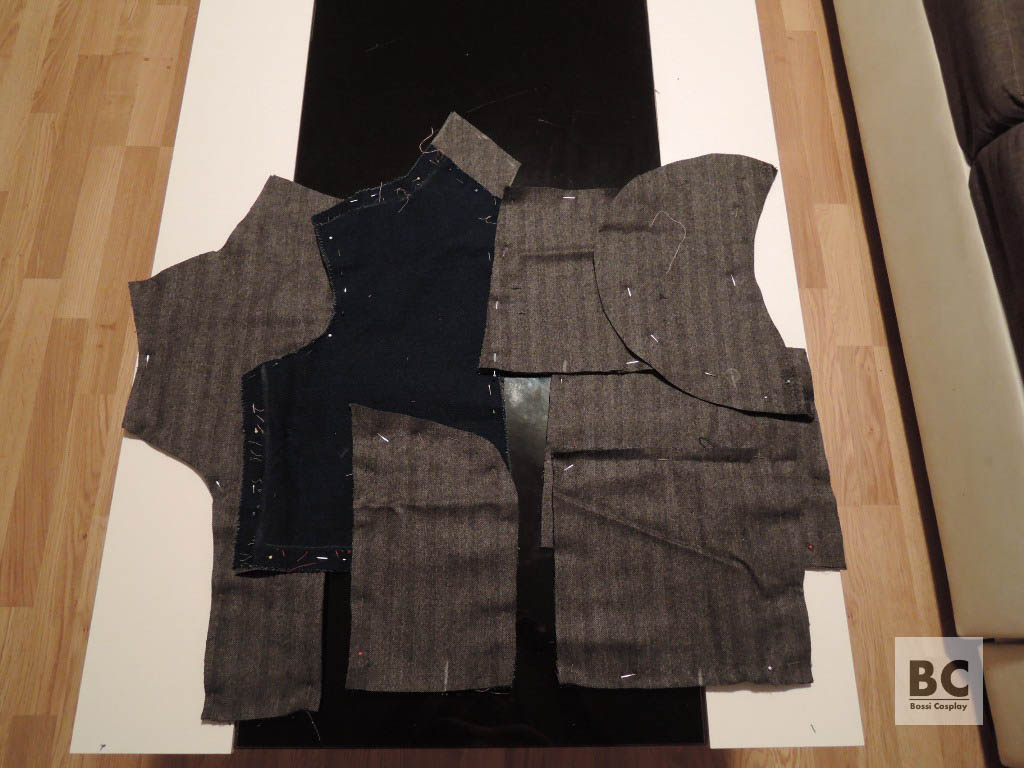
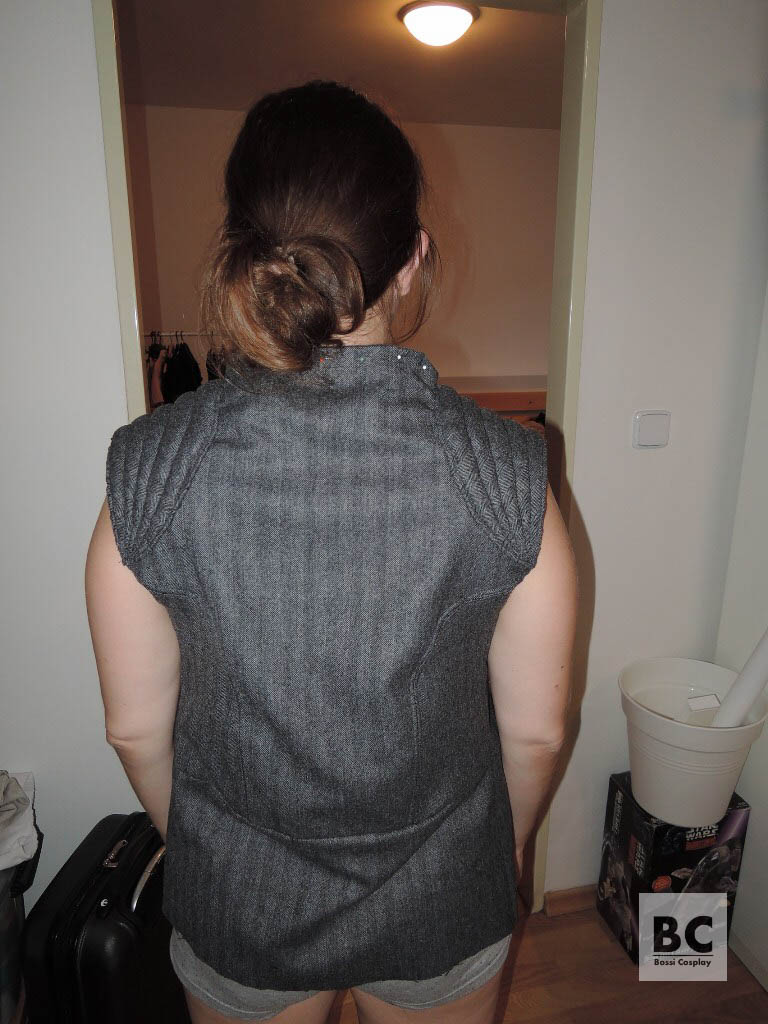
I transferred my patterns onto the fabric and sew the vest together. At the back and on the sides of collar I had to create somehow the seams with visible stitches Rey has there on the vest. So I didn’t sew those parts together normally, but put a stripe of fabric under the pieces and sewed them onto it. It created a needed gap over which I then hand sew the top cross stitches.

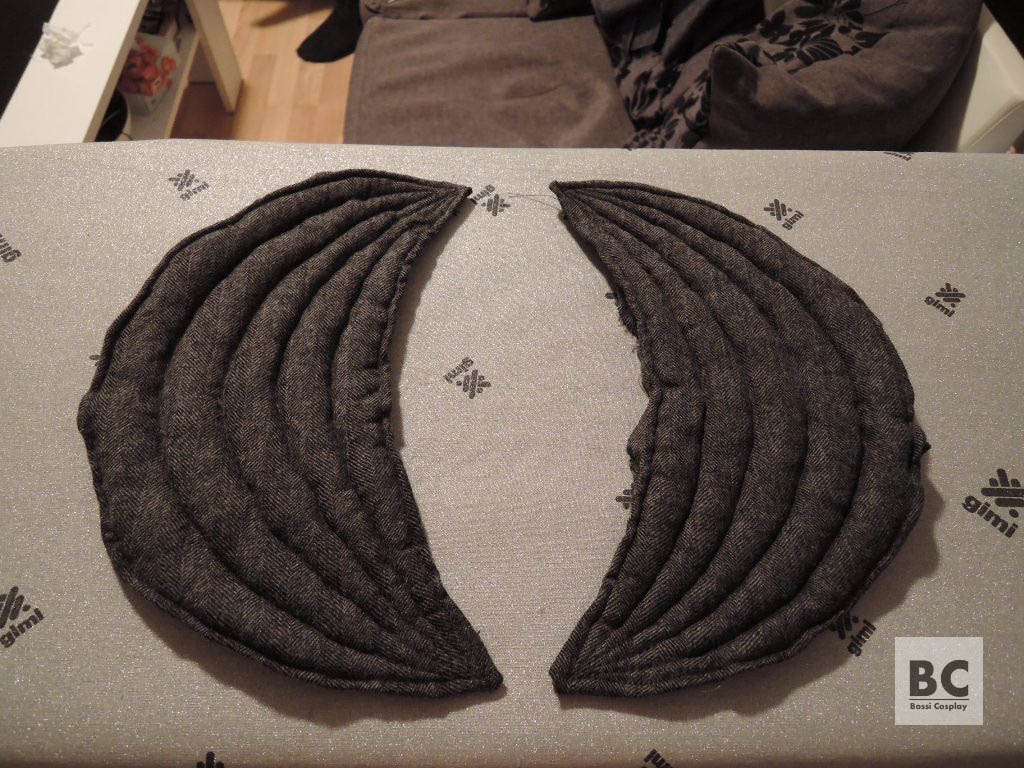
Then I moved to “shoulder pads”. I cut the two pieces of fabrics for each. I sew them together and sew through them as on the original, creating the small tunnels in this way. I cut through the bottom part of each and stuffed them individually with padding. Then I hand sewed the each pad on the shoulders.


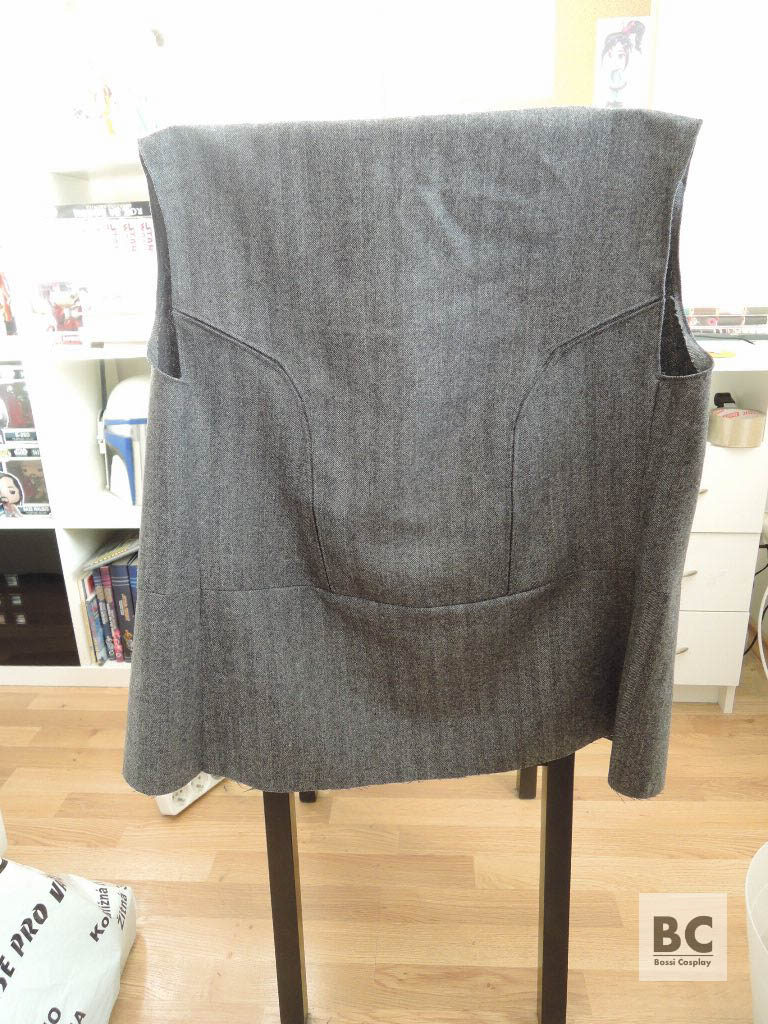
Finally I adjusted the collar to the correct shape and size and finished up the lining.
And the only thing to do then was to hand sew the stitches on the edges and to frown the bottom edge.

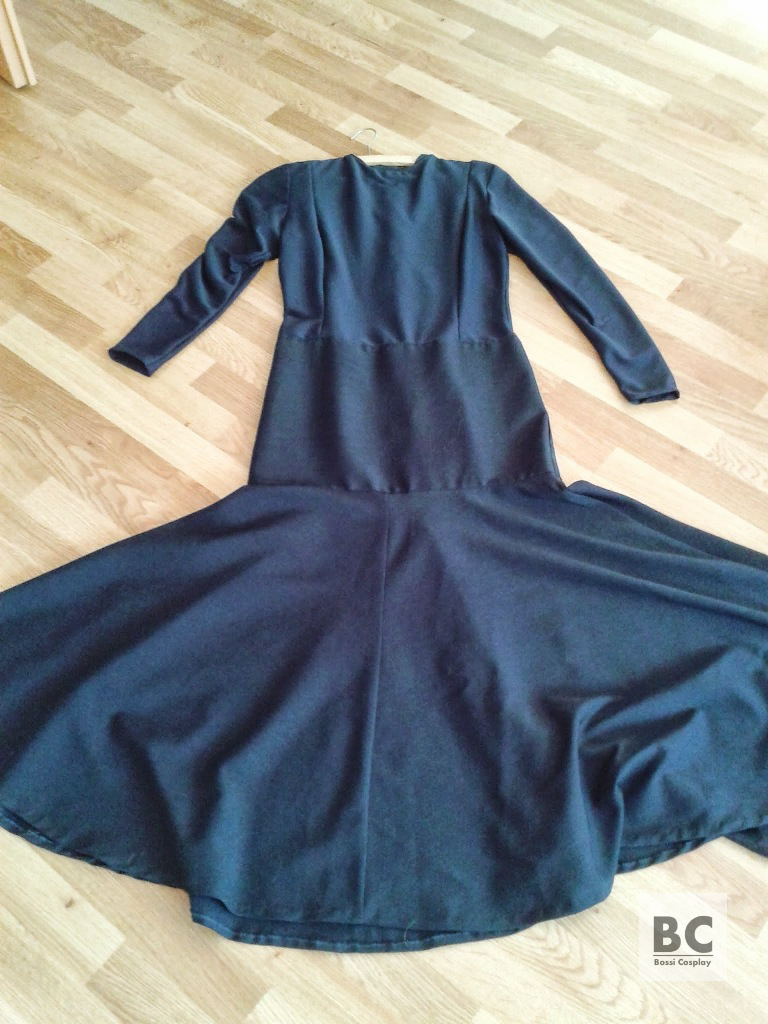
Barriss Offee dress
From practical reasons, I decided to go for dress consisting of two parts from different materials, the upper part and skirt, sewn together. I didn’t want the shirt to slide up The construction of this dress can be seen in the following photo.
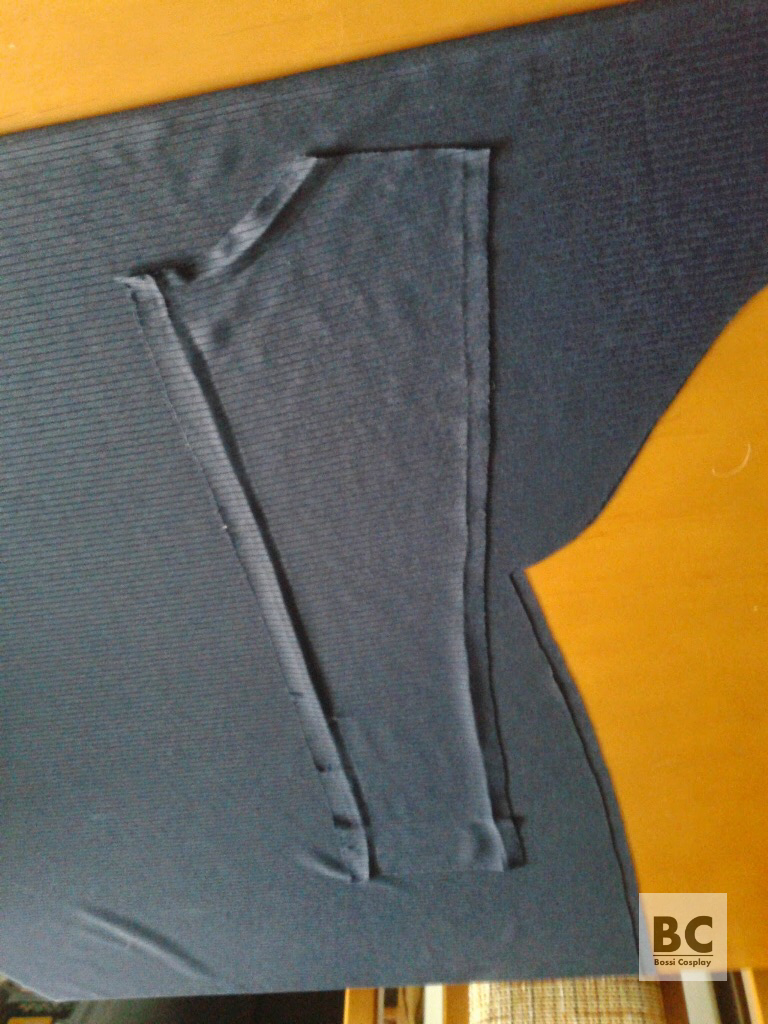
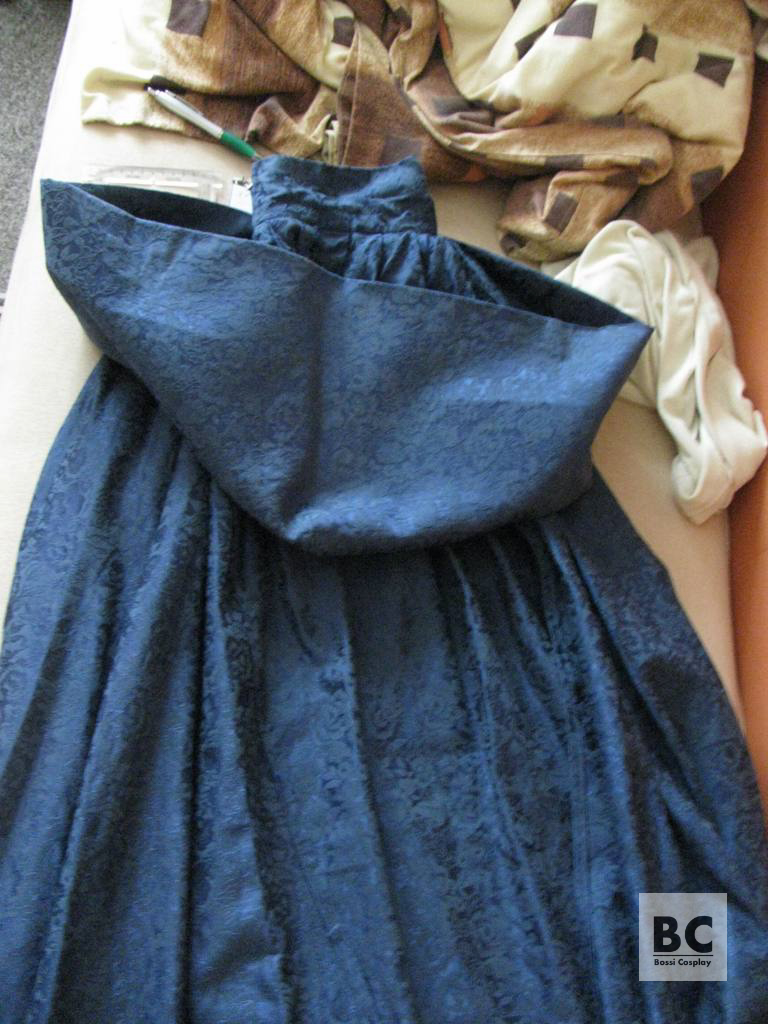
For the upper part of the dress I used some pattern for dress we (me and my mum LYA) found in old Burda magazines. The other option I considered was to use some old close fitting long sleeved shirt and create pattern based on it. However, this option would most likely need more stretchy fabric. The dress pattern (with zipper on the back) was thus more suitable for me, as the fabric I used was stretchy only a little. To highlight the difference between stripes of the chest panel and the rest of the upper part of dress, I slightly shifted the fabric so the stripes of panel would not be in line with stripes of the sides.

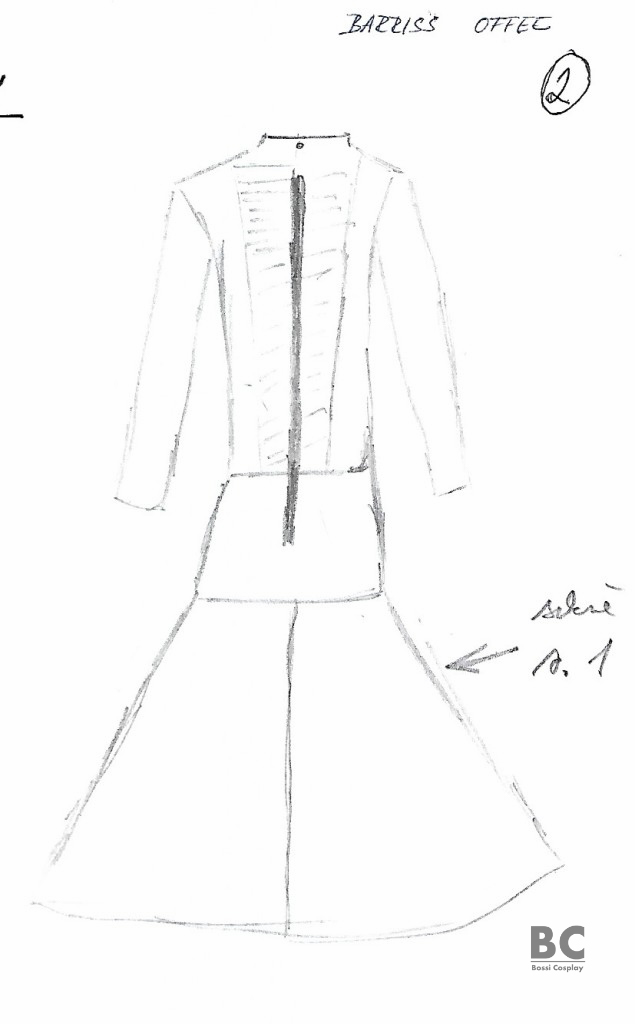
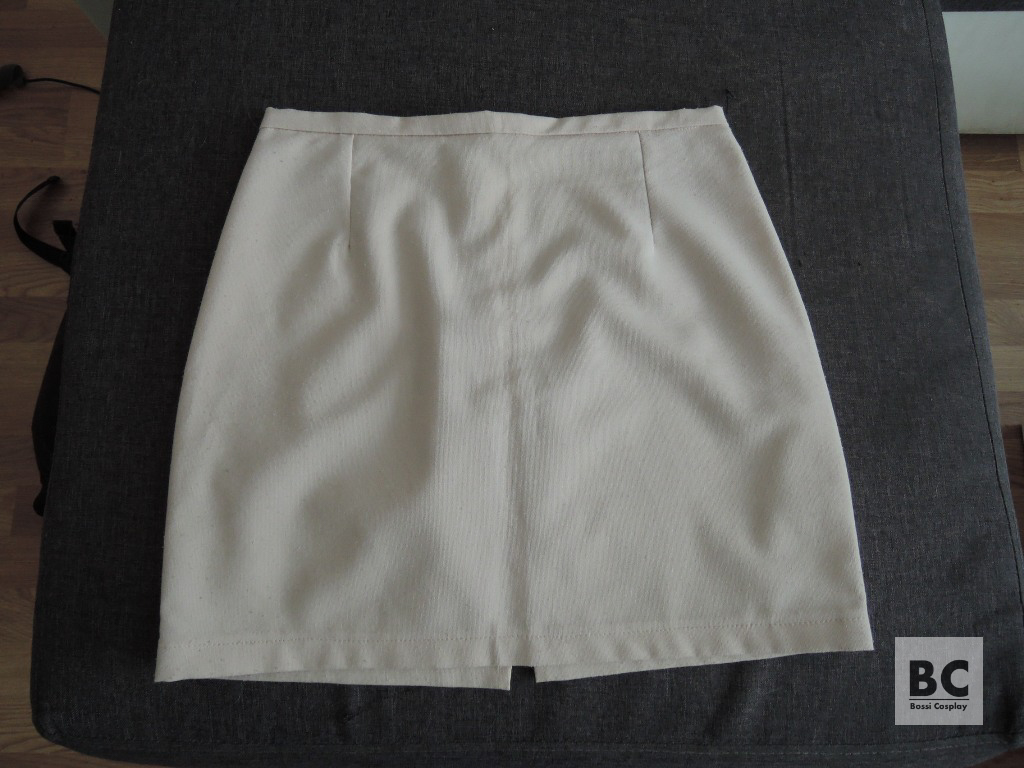
The bottom part, skirt, is from fabric which drapes nicely. I didn’t use any pattern. For the upper part of skirt I only copied the shape of the skirt I already had (the close fitting tube like skirt with the zipper at the back I use with my Jedi costume) and the bottom part consists of two large half-circles. The waist seam is covered by the belt.

Barriss Offee make-up and accessories
Make-up
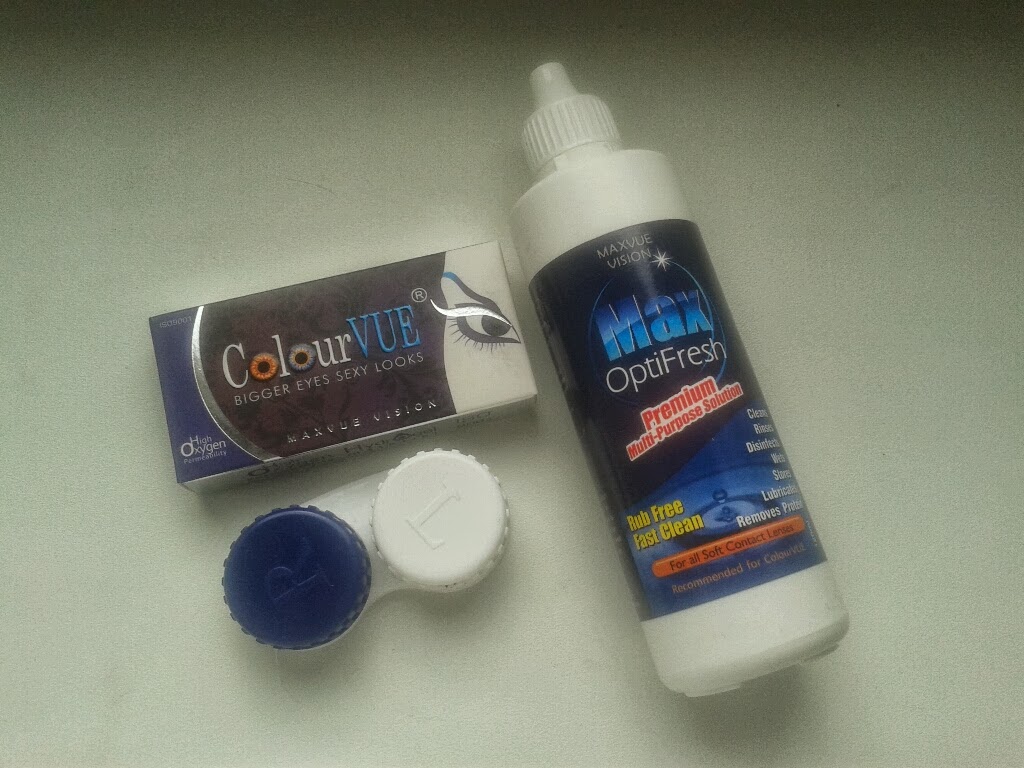
For Barriss’s tattoos I have printed out and cut out the pattern I found here (and which proportionally fits well to my face). I cut it out from a foil, which is thick enough to hold the shape, but can be bent enough to copy the shape of my nose so it is easier to draw the pattern. To paint the tattoos I use eyeliner pencil. For make-up I use yellowish/beige face colour (most often the brand of Guirca) combined/mixed with really pale make-up. To finish the look I use black lipstick, black nail polish and blue contact lenses (brand ColourVUE – BigEyes cool blue nebo Glamour blue).

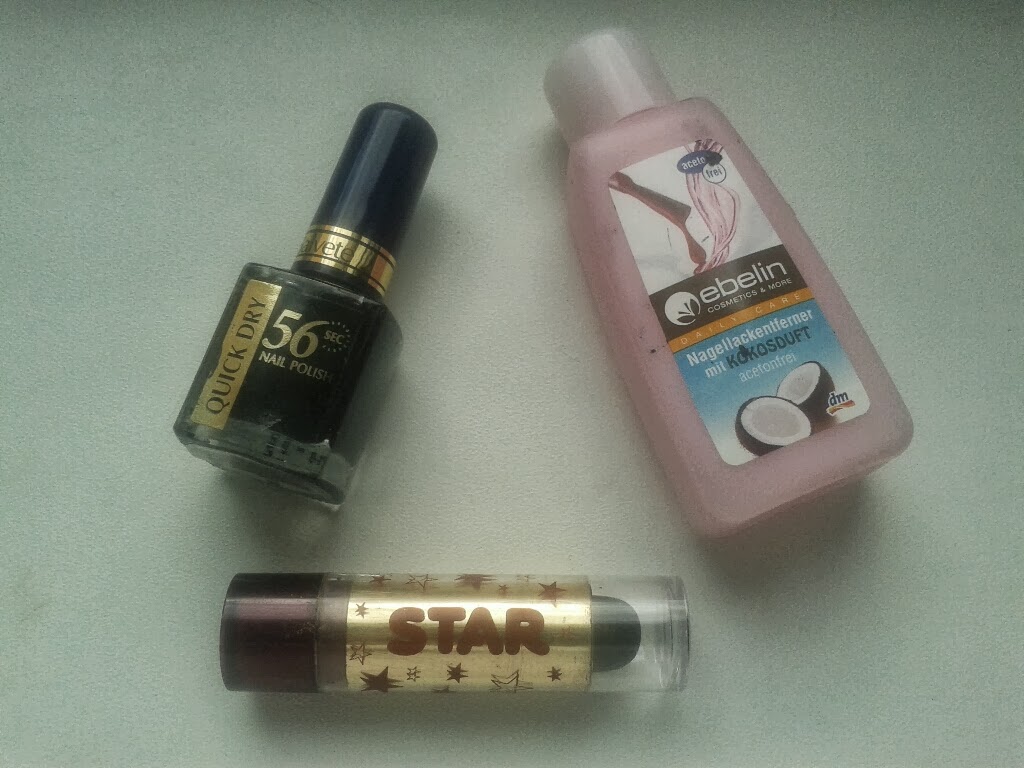
Other stuff on the picture is cream I use as the basis and the corrector stick to cover the acne or bigger flaws on my skin.
The belt and buckle
I bought the plain brown belt in army shop. Its and ordinary Czech army belt with green plain metal buckle. On this buckle my father glued on pieces of differently coloured leather to make the shape as similar to the original Barriss’s buckle as possible.


Boots and lightsaber
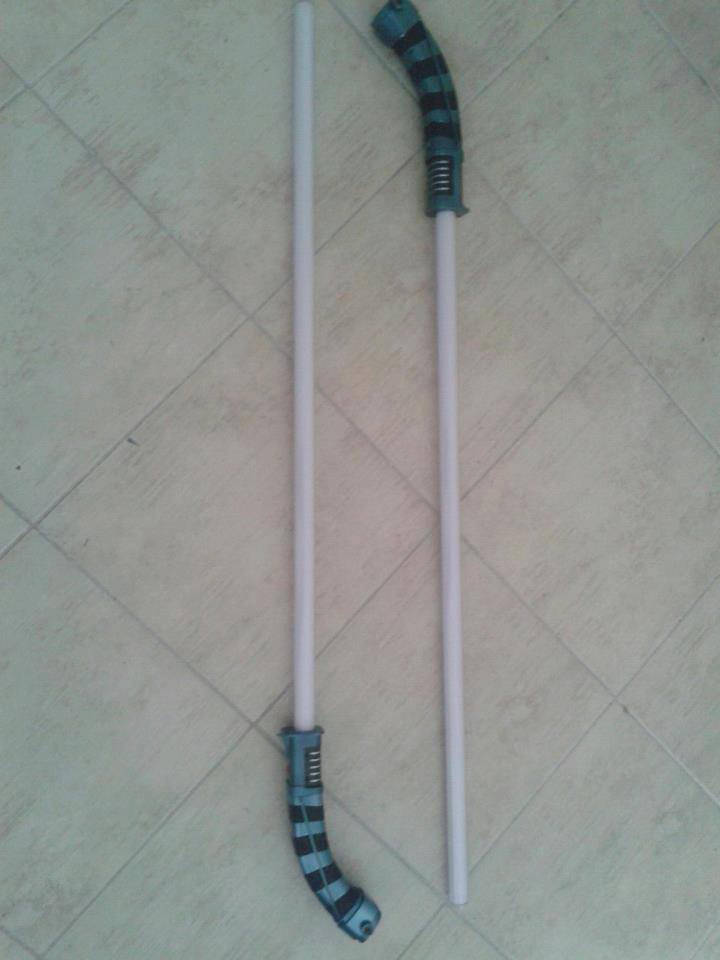
I use equestrian style black boots which I bought on eBay. They are not available anymore, but they were sold as ordinary fashionable high boots for ladies. My saber is custom-made by Nocturne Armory. It cost me a lot, but it is very accurate replica of Barriss saber hilt as seen in films, the blade can be removed and it is the one which I can fight with, the saber has sounds and blue colour. So it really was worth it.

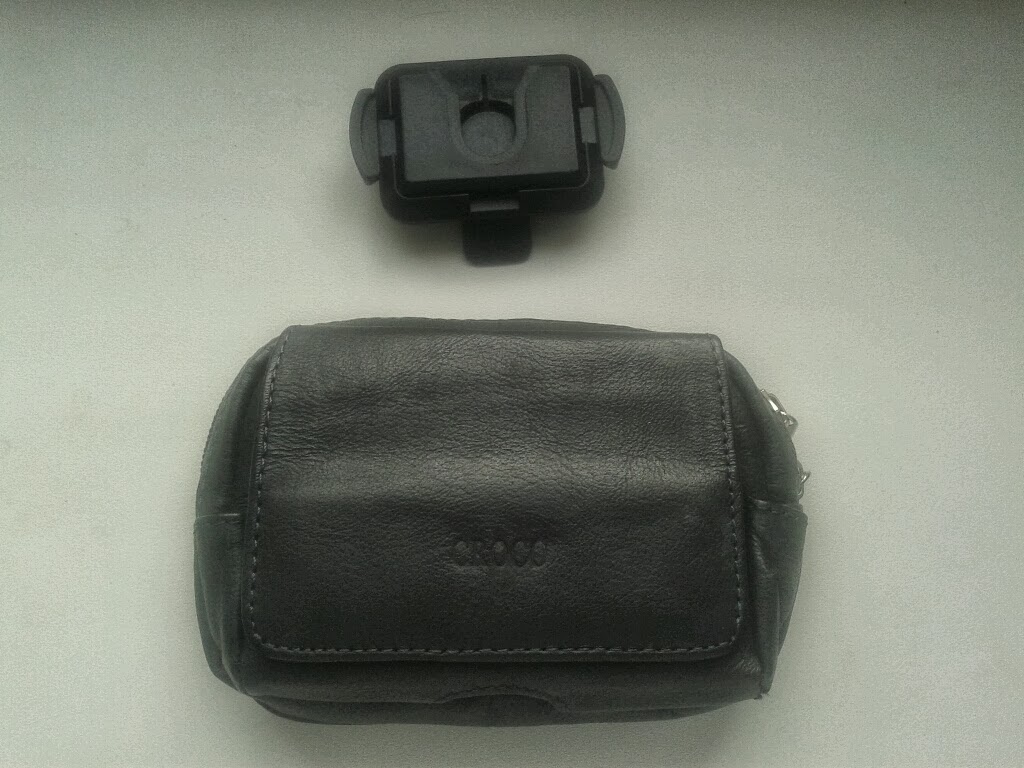
Pouch and covertec
For practical reasons I wear two other belt accessories which are not seen in films or elsewhere: covertec and pouch. When I feel like taking only the saber hilt, I use the covertec to hang it on my belt. When I’m holding the saber in my hands I just slid the covertec to my back, where it is hidden by the cloak. The same with pouch – I have it on my belt at the back, where it is hidden. This way I have some practical place where to put some money, spare batteries for saber, lipstick to correct the make-up etc. and I don’t spoil the accurateness of the costume.

Claire Redfield RE2 – the vest
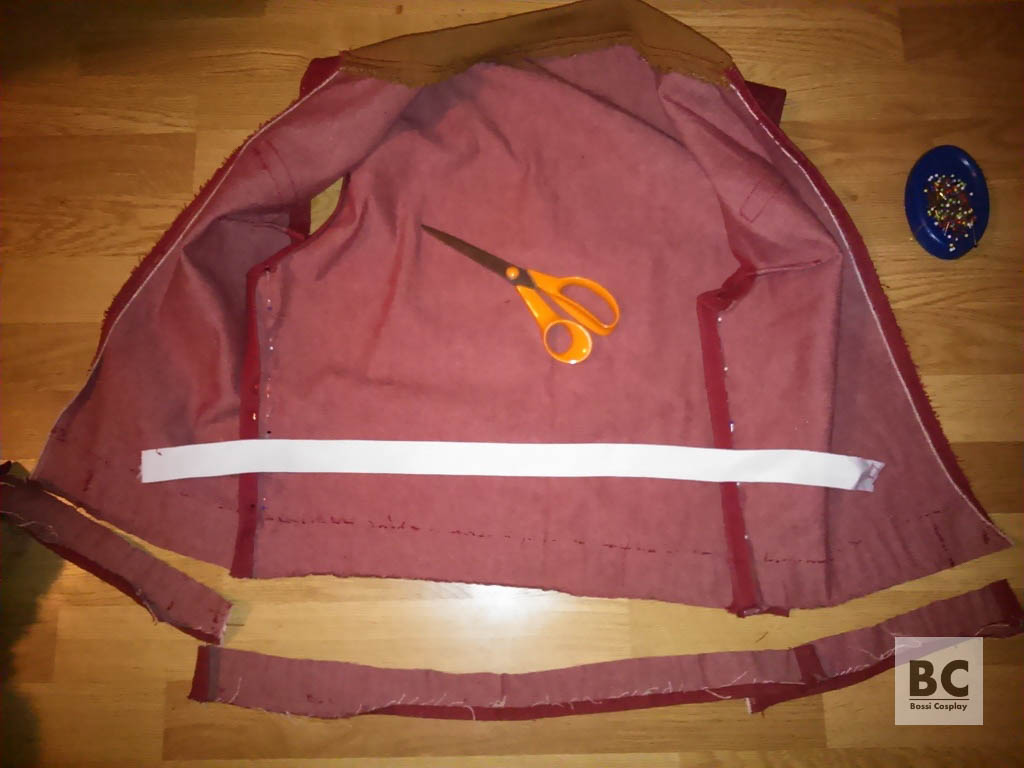
As the basis I used pattern 116 for jacket and trouser from Czech edition of Burda magazine no.2 year 1991 which I modified. I joined two parts of the pattern together to create one whole back piece and one whole front piece. “It is soooo easy to make a vest, isn’t it? Especially when you have a pattern of correct size!” …Yes, sure… After I copied the pattern onto the fabric, pinkish red denim, and cut it out, I pinned it together to make a simple vest which I tried on and… I started to cut, adjust and try on over and over again. That’s what you will do when you don’t make mock-ups.


The vest had to be shorter than the original one for which pattern was, so I went with the shorter length from the beginning (later, after first event in the costume I decided to shorten it even more). Shoulders of original pattern also didn’t fit me, so I had to adjust the armholes and, as usual, because I have “some” boobs, I had to add some darts (Claire’s model doesn’t have them – almost every game model doesn’t – they don’t think about things like that at all when making models – but to achieve the correct look I had to add them and luckily they are almost invisible on photos). I sew the vest together and tried it on once more – this time to see how big the false pockets should be and where exactly I should put them. Yaaaay for the inventor of paper tape! Thanks to it I don’t have scratches from pins all over my boobs.
At the bottom part of the vest I made a small tunnel into which I inserted the elastic. The elastic was about one third shorter then the length of my waist – this way I achieved the desired ruffled waist. Then I “only” had to sew on the knitted band as the collar and sew on the zipper. And of course finish up everything to look neat.


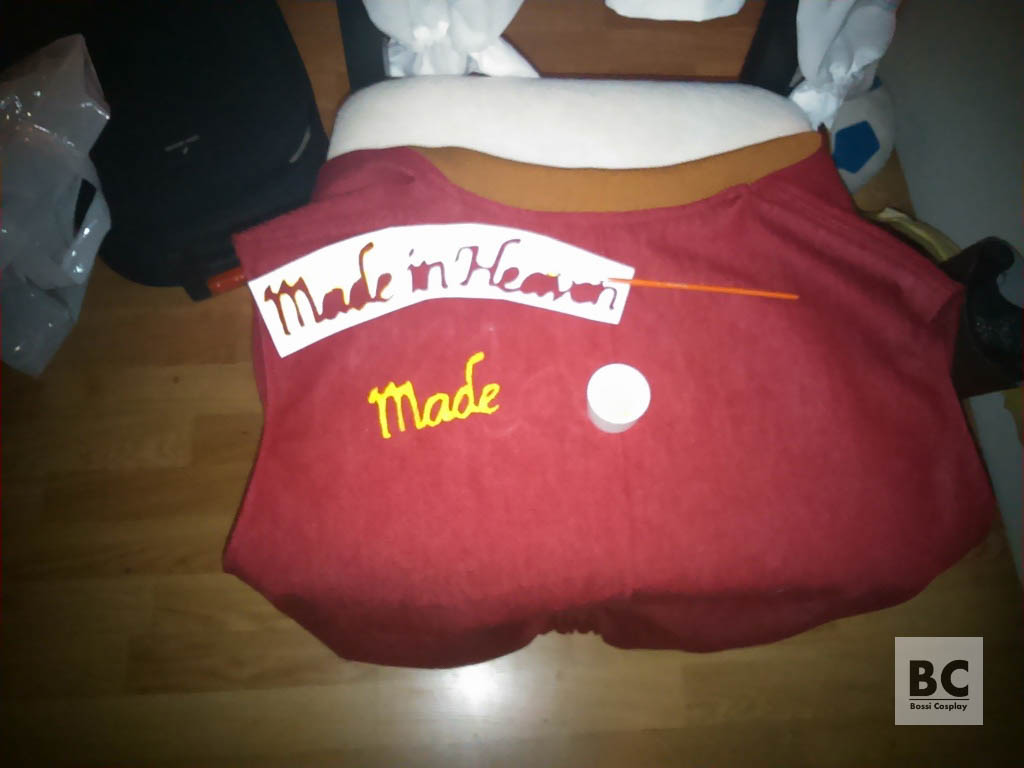
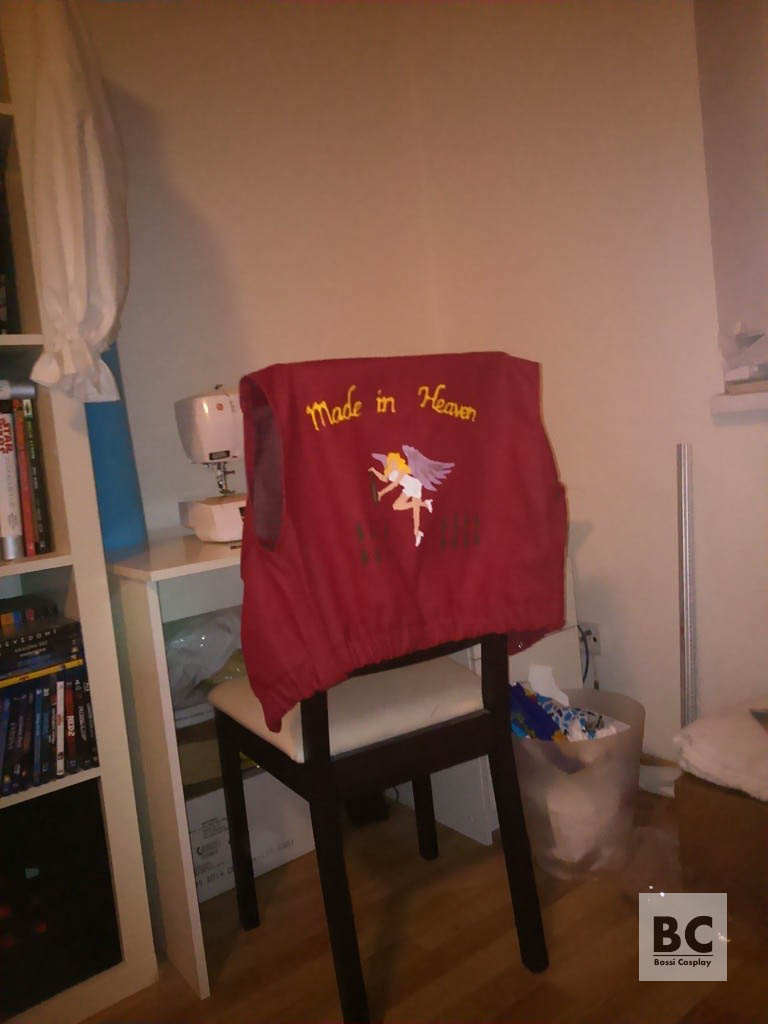
The final step, of which I was afraid of the most, was the painting of the picture on the back of the vest. Painting/drawing – my nightmare. I printed out the picture and the inscription, I cut it out and drew it onto the fabric. My hands were shaking all the time… I was so afraid of messing it up! I used Pébéo Setacolor Opaque which I’ve used before and which worked well for me. I ironed up the paints, I ironed down the darts, pockets, seams etc. and I was really pleased with how it all turned out. I was soooo happy thatI was going to cosplay Claire – finally.

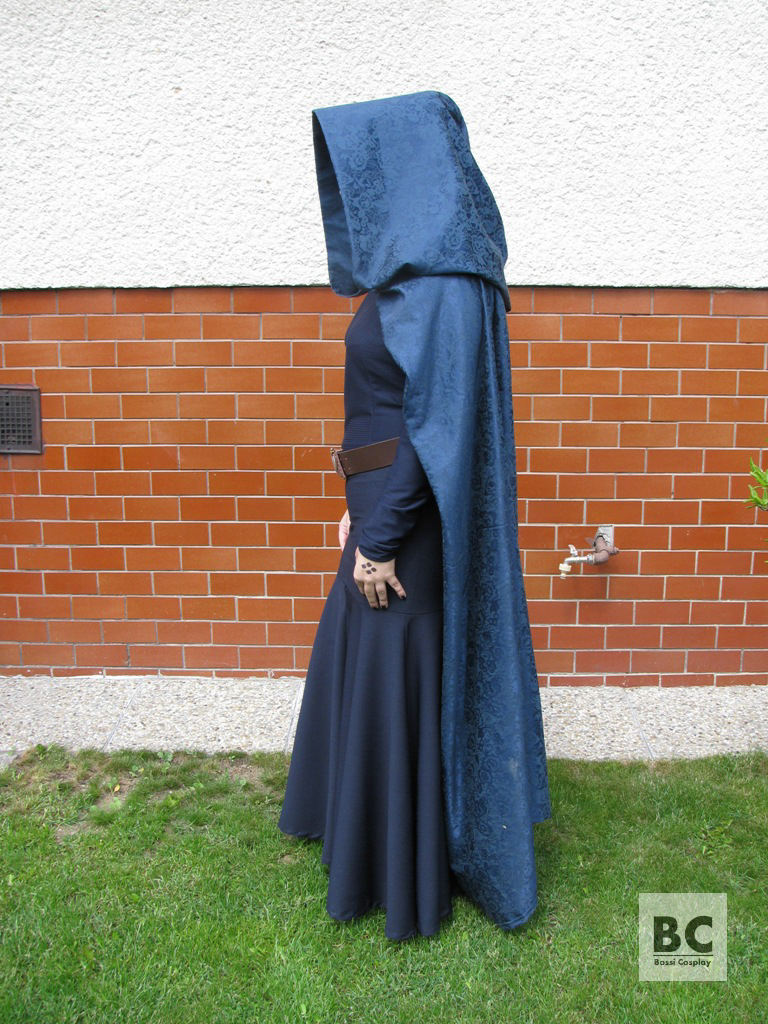
Barriss Offee – cloak
I wanted costume of Barriss Offee for a very long time, but I didn’t have skills and money. So as soon as I saved some money and found a suitable cloak fabric, I started to work on the costume. The most important was to find out how the cloak is made. The construction of the cloak is quite elaborate and it wasn’t easy to come out with solution with the right effect. However, the final product looks and functions really well and I am very proud of it. The main help in figuring out the construction was the Barriss Offee doll. It has some additional stitches on the back of the cloak. Based on this I realized for the first time that the cloak can actually be yoked at the back.


The second great help were sketches you can find on The Padawan’s Guide. I wrote to the author asking about the source on which these sketches are based and her explanation was sufficient enough for me to decide I need and want to make the back pleated, with yoke, make a high collar on the cloak and to have the cloak thrown over and attached to my shoulders. You can see how my cloak is constructed on this sketch:

The yoke consists of four same pieces of fabric. Two are on top of each other (as two layers) in back and two are on top of each other (as two layers) in front. They are connected together by their shortest sides on shoulders (at one shoulder they are connected by the zipper, which extends to the collar part and allows me to get into the cloak, and on the second shoulder they are just sewn together).


So the yoke is actually double layered and in between these layers, on the bottom, longer side of it, the main part of the cloak (a huge rectangular pleated piece of fabric) is attached. To the shorter, upper part of the yoke the collar (and the hood) is attached.
The collar is double layered as well – in between the collar layers the hood is sewn (except for its short part in front, which is attached by velcro – to allow me work with zipper).
As you can see, I used fabric which doesn’t have 100% similar pattern as it could be seen in the film – as soon as I’ll have time, I’ll try to re-make the cloak with fabric which I’ll hand-paint. So two points about fabric:
- Find fabric with the most similar pattern or hand-paint your own.
- Find fabric which is a little heavier one so it would float/drape well.


As far as the hood is concerned… I followed the tutorial here on Jedi Assembly. I used the same shape and measurments offered. I ended up with huuuuuge piece of fabric, which I had to reduce into the desired size, but in general, the shape is good. The hood is stiffened by “vlizelín” (sorry, don’t know the English word for that), which is ironed by a hot iron onto the fabric. I ironed it into “the pocket”.
What I mean by “the pocket”? Front side of my hood is folded and turned inside so it creates a sort of pocket, which stiffens the hood a little bit and offers me to effectively hide this stiffening stuff I used, and more importantly – a wire. This stiffened part ends on top of my head.


I mentioned a wire – I wanted to be able adjust the shape of the hood better so I inserted a thin wire into the pocket. The wire is lining the whole facing of my hood and as I say, allows me to adjust the shape better. Thanks to the open pocket it can be taken away and it won’t damage the fabric during washing.